Pool Leak Detection & Repair Services in Orange County, CA
H2O Leak Pros – A Dedicated Division of Alan Smith Pools
If you notice your pool water level dropping faster than usual, you may have a leak, and ignoring it can cause serious damage to your pool shell, surrounding landscaping, and even your home’s foundation. H2O Leak Pros is the specialized leak detection and repair division of Alan Smith Pools, serving homeowners across Orange County, Los Angeles County, and the Inland Empire since 1981.
Our technicians use a multi-step diagnostic process, including visual inspection, dye testing, pressure testing, and electronic sonar technology, to pinpoint exactly where your pool is losing water. Once we know the source, we provide a detailed written report and a transparent repair estimate with no surprises.
Get an Instant Leak Detection Quote | Call (714) 628-9494
How to Detect and Fix Pool Leaks: A Step-by-Step Guide
Losing water from a pool is common, but figuring out whether you’re dealing with a real leak or just normal evaporation is the first challenge most homeowners face. This guide walks through how to identify a pool leak, what the diagnostic process looks like, and how to decide when to call a professional.

Step 1: Rule Out Evaporation First
Before assuming you have a leak, it’s worth confirming that water loss is actually abnormal. In Southern California’s warm, dry climate, a pool can lose ¼ to ½ inch of water per day through evaporation alone, more during hot or windy stretches.
The Bucket Test is the standard way to separate evaporation from a genuine leak:
- Fill a 5-gallon bucket with pool water and place it on the first or second step of the pool (so it’s partially submerged and exposed to the same conditions as the pool).
- Mark the water level inside the bucket and the pool water level on the outside of the bucket with tape or a marker.
- Turn off the auto-fill valve if you have one.
- Wait 24–48 hours without using the pool.
- Compare the two levels.
What the results mean:
- If both levels dropped by the same amount, you’re losing water to evaporation, not a leak.
- If the pool dropped noticeably more than the bucket, you likely have a leak.
Run the test twice: once with the pump running and once with it off. If the pool loses more water with the pump on, the leak is likely in the plumbing or equipment. If loss is the same either way, the shell or fittings are more likely suspects.
Step 2: Look for the Obvious Signs
Once you suspect a leak, a visual walkthrough of your pool and equipment area can reveal a lot before any specialized testing begins.
Around the pool shell:
- Cracks in the plaster, particularly near fittings, steps, or corners
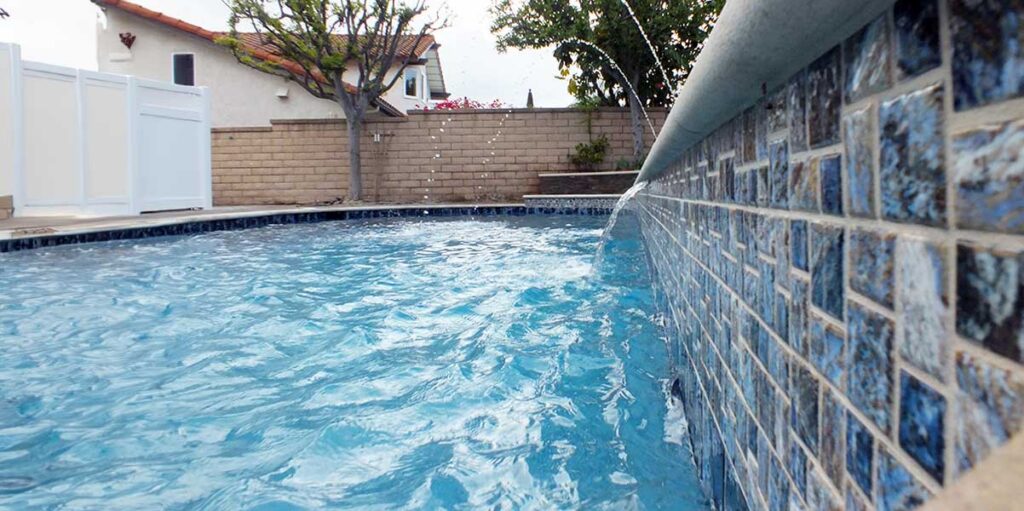
- Separated or cracked coping at the waterline
- Lifting or staining around the waterline tile
- Wet or soft ground around the pool perimeter that doesn’t dry out
Around the equipment pad:
- Visible drips or water staining on the pump, filter, or heater
- Corrosion around fittings and valves that suggests chronic moisture
- Ground saturation around or downhill from the equipment pad
- The pump is frequently losing prime or running dry
In the pool itself:
- Water level consistently settling at a certain point, often around a return fitting or light niche, which can indicate the leak is at that elevation
- Algae or staining concentrated near a specific fitting
Note what you find. These observations help a technician prioritize which tests to run first.
Step 3: Understand the Types of Pool Leaks
Pool leaks generally fall into a few categories, and knowing which type you’re dealing with determines how to find and fix it.
Shell leaks occur in the plaster or gunite itself, typically from cracks caused by ground movement, age, or improper water chemistry that’s eroded the surface. These are often visible but can also be hairline-thin and hard to spot without dye.
Fitting and extrusion leaks occur at points where plumbing penetrates the pool wall, including returns, suction lines, the main drain, the skimmer, and light conduits. The seal around these fittings can fail over time, especially as pool shells shift slightly.
Underground plumbing leaks are the most difficult to locate and the most disruptive to repair. If a buried pipe develops a crack or a joint separates, water can migrate significant distances underground before becoming visible at the surface, or never become visible at all.
Equipment leaks are leaks at the pump, filter, heater, valve, or backwash line, generally the easiest to identify and fix since everything is accessible above ground.
Step 4: How Professional Leak Detection Works
If your bucket test confirms a leak and your visual inspection doesn’t reveal an obvious cause, the next step is professional diagnostic testing. Here’s what that process typically involves:
Visual Inspection A technician will walk the entire site, equipment, all fittings, tile, coping, backwash valve, looking for physical evidence of where water is escaping.
Dye Testing Using a syringe, the technician applies a small amount of colored dye near suspected leak points below the waterline, returns, drains, skimmer throats, light housings, and fittings. If water is pulling through a crack or gap, the dye will visibly draw toward it. This is precise, non-destructive, and effective for shell and fitting leaks.
Pressure Testing: Each plumbing line is isolated and pressurized. A drop in pressure indicates a breach somewhere in that line. This is the standard method for confirming and locating underground pipe leaks before any digging begins.
Electronic Sonar / Acoustic Detection. After pressure testing identifies which line is compromised, acoustic equipment is used to listen for the leak underground. Water escaping under pressure creates a sound signature that sonar equipment can pinpoint to within a few inches, dramatically reducing the amount of decking or soil that needs to be opened for repair.
Leakalyzer Testing: An electronic evaporation meter placed on the pool surface measures water loss with precision over a short time window, accounting for temperature and weather conditions. This removes ambiguity from the evaporation question when the bucket test result isn’t conclusive.
Step 5: Common Pool Leak Repairs
What it takes to fix a pool leak depends entirely on where the leak is.
- Shell cracks — Small surface cracks in plaster are typically repaired with hydraulic cement or epoxy injection. Structural cracks (those that go through the gunite shell) require more involved repair, sometimes including chiseling out and patching the affected area.
- Fitting leaks — A leaking return fitting or skimmer is often repaired by resealing or replacing it. In some cases, the fitting can be sealed from inside the pool without draining.
- Light niche leaks — Pool light conduits are a surprisingly common source of leaks. Water can travel through the conduit itself. The fix usually involves sealing the conduit at the niche with hydraulic putty or epoxy.
- Underground pipe leaks — Once pinpointed acoustically, a targeted excavation opens just the affected area. The pipe is repaired or rerouted, and the area is backfilled. Because the leak location is precise, this is far less disruptive than it used to be before sonar detection was available.
- Equipment leaks — Usually resolved by replacing a worn seal, O-ring, union fitting, or valve. In some cases, aging equipment is more cost-effective to replace than to continue repairing.
Step 6: What to Expect After Repairs
A reputable pool leak specialist will provide a written report documenting every test run and every finding, not just a verbal summary. That report should include the location of any leaks, the method used to find them, and the recommended repairs.
After repairs are completed, it’s worth re-running the bucket test to confirm the water loss has stopped. If you had underground plumbing repaired, allow a few days for the ground to dry out before drawing conclusions from the test.
When Should You Call a Professional?
Most homeowners can complete the bucket test and visual inspection on their own. But once those steps point to a leak, especially one that isn’t obviously visible, professional diagnostic equipment makes a significant difference in accuracy.
Attempting to locate an underground leak without acoustic detection usually means unnecessary excavation. Attempting to pressure-test plumbing lines without the right equipment risks misinterpreting the results. The cost of professional detection is almost always less than the cost of the wrong repair.
H2O Leak Pros is the leak detection and repair division of Alan Smith Pools, serving Orange County and surrounding areas. Their technicians use the full diagnostic process described above, visual inspection, dye testing, pressure testing, and electronic sonar, and provide a written report after every service.
- Leakalyzer test (confirms whether a leak exists): $150
- Full leak detection service (locates the leak and documents findings): Starting at $750
Schedule a Leak Detection Appointment | Call (714) 628-9494